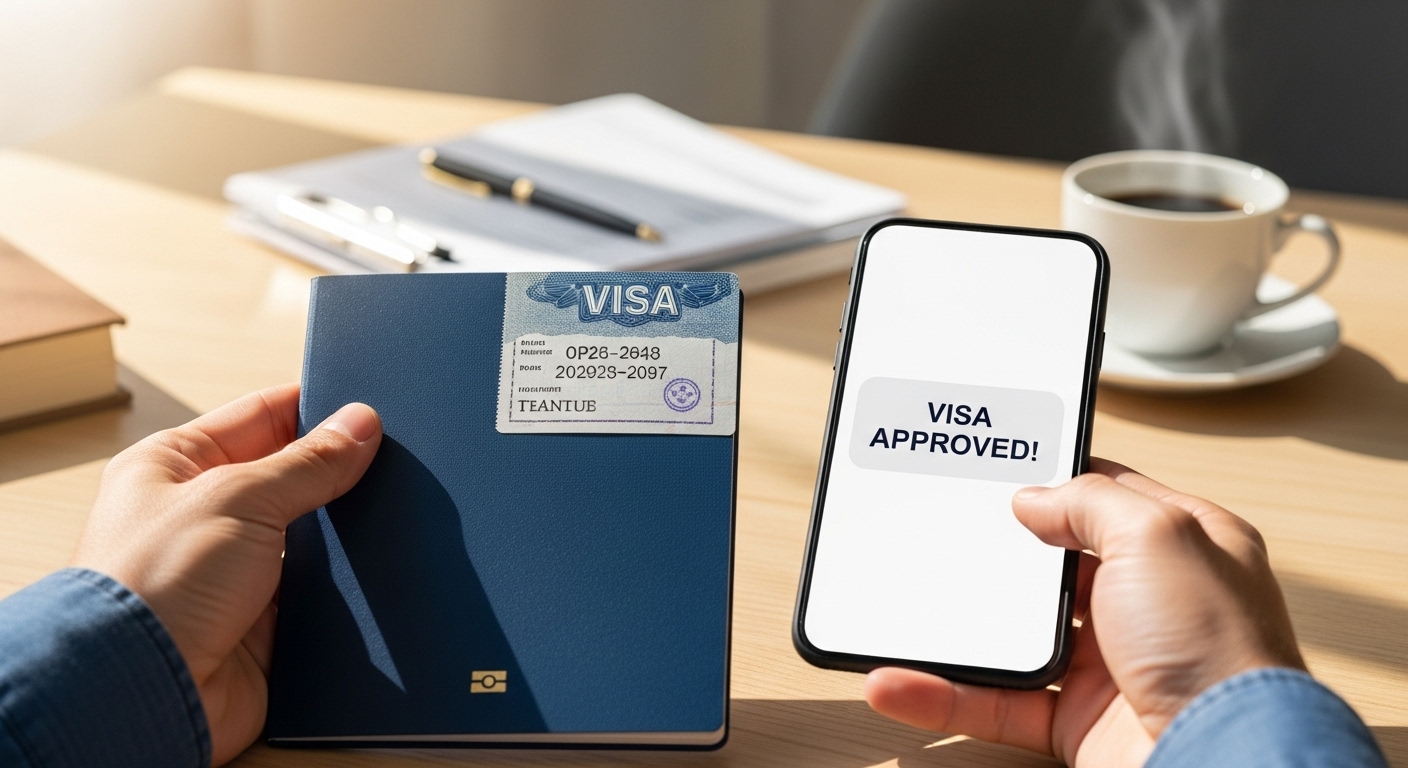
How to Get Your Visa Approved the First Time. “While thousands of students are already packing their bags for Paris, Toronto, or New York, you could be stuck waiting months because of a visa denial. Don’t let small mistakes steal your dream of studying abroad—here’s how to get your visa approved the first time, stress-free.”
Imagine this: your classmates are posting pictures from orientation week at prestigious universities abroad, attending networking events, and exploring new cities. Meanwhile, your visa application is stuck in limbo, and you’re staring at an uncertain timeline. For first-time applicants, this scenario is more common than you think. According to the U.S. Department of State, the average global refusal rate for first-time nonimmigrant visas is between 20–25%, and for countries like the UK, Canada, and Schengen regions, denials can be as high as 30% if applications are incomplete or inconsistent.
The emotional toll of a delayed visa can be significant. Research shows that students awaiting visa approval experience increased stress, anxiety, and even social isolation, as they watch peers progress while they feel stuck in uncertainty. One survey by the Institute of International Education found that 41% of prospective international students reported feeling anxious or demotivated due to visa delays. The stakes are high—not just for your academic plans but for your mental well-being and future career opportunities.
But here’s the good news: most visa rejections are preventable. With the right preparation, clarity, and strategy, you can present yourself as a credible applicant and drastically increase your chances of approval on the first try. This guide will take you step by step through what matters most—from understanding visa types, organizing critical documents, showcasing financial preparedness, to acing the interview.
By following these proven steps, you won’t just avoid common pitfalls—you’ll position yourself ahead of thousands of other applicants who leave their applications to chance. Think of it as creating your personal fast track to study abroad success. Every day you delay preparation increases the risk of missing deadlines or making mistakes that could push your dreams further away.
It’s not just about paperwork. It’s about ensuring that your months or years of planning, saving, and hard work don’t unravel because of avoidable errors. The clock is ticking, and your competitors—students who are proactive—are moving forward. The best strategy? Start now, follow the steps meticulously, and approach your visa application with confidence and clarity.
Understand Your Visa Type & Requirements
Before you even fill out a single form, understanding the type of visa you need is critical. Not all visas are created equal, and applying for the wrong one—or misunderstanding its requirements—can result in delays or outright rejection. Study-abroad visas generally fall into a few broad categories: student visas, work visas, and exchange or internship visas. Each has its own documentation requirements, eligibility criteria, and application procedures.
Why Knowing Your Visa Type Matters
Visa officers are trained to look for credibility, intent, and preparedness. If your application does not match the type of visa you are applying for, it raises immediate red flags. For example, a student visa applicant who appears to be primarily working or earning income may be flagged for misrepresentation, even if unintentionally. Conversely, a tourist applying for a short-term study program without proper student visa documentation can face denial.
Country-Specific Nuances
Different countries have unique expectations:
- United States (F-1/J-1 Visas): Focuses heavily on intent to study and return home. Financial proof, admission letters, and ties to your home country are key. Interviews are mandatory and highly structured.
- United Kingdom (Tier 4/Student Visa): Requires proof of acceptance, financial sufficiency, and compliance with English language requirements. Tier 4 visas emphasize genuine student intent, so showing your long-term career or academic goals is important.
- Canada (Study Permit): Assesses financial stability, acceptance by a recognized institution, and a clear plan for returning home. Canada also looks at immigration history and prior travel experience.
- Schengen Visa (Short-term Study or Exchange): Requires travel insurance, itinerary proof, and accommodation details. The Schengen visa is strictly time-bound, so overstays are closely monitored.
- Australia (Student Visa Subclass 500): Evaluates enrollment in a recognized course, financial capacity, English proficiency, and compliance with visa conditions.
Research & Preparation Tips
- Always check the official embassy or consulate website of your destination country to ensure you are using the latest forms and guidelines.
- Verify whether additional documents, such as medical certificates, police clearances, or biometric submissions, are required.
- Understand processing timelines for each country. U.S. visas, for instance, can take weeks to months depending on the season and consulate location, whereas some Schengen visas may be processed in as little as 15 calendar days.
Takeaway
Understanding your visa type is the foundation of a successful application. Without this knowledge, every subsequent step—document preparation, financial proof, SOP writing, and interview preparation—risks being misaligned with consulate expectations. Think of it as building a house: if your foundation is weak, the structure cannot stand. By investing time in research and clarity upfront, you set yourself up for smoother, faster approval.
Start Early & Make a Timeline
When it comes to securing a study-abroad visa, time is your most valuable asset. Many first-time applicants underestimate the complexity of the process, assuming that forms can be filled out last minute or documents gathered in a week. In reality, starting early is one of the most powerful strategies for first-time visa success.
Why Early Preparation Matters
Visa applications are a multi-step process, and delays can occur at any stage:
- Processing times for certain countries can stretch from two weeks to three months, depending on the season and consulate workload. For instance, U.S. student visas during peak months (July–September) can take up to 60 days for interview scheduling.
- Gathering critical documents like bank statements, sponsorship letters, or property proof often requires coordination with banks, educational institutions, or government offices.
- Mistakes caught too late—like missing forms, incorrect translations, or incomplete SOPs—can force resubmissions, further delaying your plans.
Starting early allows you to anticipate delays, double-check documents, and practice for interviews, minimizing stress and boosting confidence.
Creating a Step-by-Step Timeline
Here’s a practical timeline to follow:
3–4 Months Before Departure
- Research visa type and requirements for your destination country.
- Confirm your admission or job offer if applicable.
- Start gathering essential documents (passport, academic records, financial proof).
2–3 Months Before Departure
- Complete the visa application forms accurately.
- Arrange for translations of documents if necessary.
- Draft your Statement of Purpose (SOP) and personal statements.
- Schedule your visa interview or appointment if required.
1–2 Months Before Departure
- Prepare supporting documents in a well-organized folder.
- Conduct mock interviews and practice answering common visa questions.
- Double-check financial documents for consistency and sufficiency.
2–4 Weeks Before Departure
- Confirm that your visa has been approved and all documents are stamped correctly.
- Make travel arrangements (flights, accommodation) only after visa approval to avoid unnecessary losses.
Checklist for Time Management
- ✅ Research visa requirements early
- ✅ Gather documents methodically
- ✅ Draft SOPs and statements
- ✅ Schedule appointments promptly
- ✅ Practice for interviews
- ✅ Leave buffer time for unexpected delays
Real-World Example
A Nigerian student applying for a Canadian study permit started preparing six months in advance. By the time her appointment came around, all documents—including bank statements, school transcripts, and a well-crafted SOP—were ready. She completed her interview confidently and received approval within two weeks. In contrast, a friend who started only one month prior faced rescheduling, document corrections, and a stressful wait, delaying his departure by several months.
Takeaway
Early preparation is not just a recommendation—it’s a necessity. The earlier you start, the more time you have to identify gaps, correct mistakes, and present a complete, credible application. Time management is often the difference between a smooth first-time approval and months of stress and uncertainty.
Collect & Organize Critical Documents
Once you’ve determined your visa type and created a timeline, the next crucial step is document collection and organization. Visa officers evaluate applications primarily through the evidence you provide. Missing, incomplete, or disorganized documents are among the top reasons first-time applicants face denial.
Essential Documents for Most Study-Abroad Visas
- Passport
- Must be valid for at least six months beyond your intended stay.
- Ensure you have blank pages for visas and entry stamps.
- Check for expiry dates early to avoid last-minute renewals.
- Visa Application Form
- Complete accurately and truthfully.
- Minor errors—wrong dates, inconsistent spellings, or unchecked boxes—can raise red flags.
- Financial Proof
- Bank statements showing consistent funds for 3–6 months.
- Sponsorship letters detailing who will support your studies, their relationship to you, and their financial capacity.
- Scholarship letters specifying the coverage period and amount.
- Academic or Professional Records
- Transcripts, diplomas, certificates, and recommendation letters.
- For work visas, include employment letters, contracts, and proof of experience.
- Statement of Purpose (SOP)
- Explains your study/work goals, intent to return, and alignment with your career or academic path.
- Ties to Home Country
- Property ownership, family ties, employment, or ongoing education.
- Helps prove your intent to return home after your stay.
- Travel Itinerary & Accommodation Proof
- Flight bookings, hotel reservations, or invitation letters if staying with family/friends.
- Photographs
- Ensure size, background, and format meet country-specific requirements.
- Additional Documents
- Some countries require police clearance certificates, medical tests, or language proficiency scores.
Tips for Organizing Documents
- Digital & Physical Copies: Keep scanned copies on a secure cloud or USB drive, and physical copies in a neatly labeled folder.
- Consistent Naming Conventions: Label each file clearly (e.g., BankStatement_June2025.pdf).
- Translations: If your documents are not in the official language of the destination country, provide certified translations.
- Checklists: Use a step-by-step checklist to ensure no document is forgotten.
Real-World Example
A student applying for a UK Tier 4 visa initially submitted her bank statement with only one month of funds. The visa was rejected. On resubmission, she included six months of consistent bank history, a sponsorship letter, and proof of tuition payment, and the visa was approved on the first try.
This shows that organization and thorough documentation can directly impact approval. It’s not just about having documents—it’s about presenting them in a way that is clear, consistent, and credible.
Takeaway
Document collection and organization are the backbone of your visa application. Missing or poorly organized documents can delay approval or trigger outright denial. By systematically gathering, verifying, and arranging all required materials, you present yourself as a prepared, credible applicant—dramatically increasing your chances of first-time approval.
Demonstrate Financial Preparedness
Financial evidence is one of the most scrutinized parts of any study-abroad visa application. Visa officers want to see proof that you can cover tuition, living expenses, and unforeseen costs without resorting to illegal work or overstaying. Demonstrating financial preparedness isn’t just about showing a large number—it’s about consistency, credibility, and proper documentation.
Why Financial Proof Matters
Visa officers use financial documentation to assess whether:
- You can sustain yourself throughout your stay.
- You are not a potential burden on the host country.
- You have strong ties to your home country, reducing the risk of overstaying.
A lack of clear financial evidence is one of the top reasons first-time applicants face rejection. According to research from ICEF Monitor, insufficient financial proof accounts for nearly 25% of all student visa denials globally.
Types of Acceptable Financial Proof
- Bank Statements
- Show 3–6 months of consistent funds.
- Large one-off deposits can raise suspicion; visa officers prefer steady balances.
- Sponsorship Letters
- If someone else is funding your studies, include:
- Sponsor’s relationship to you
- Financial capacity
- Duration and amount of support
- If someone else is funding your studies, include:
- Scholarship Letters
- Clearly state the amount awarded, coverage period, and tuition/expense details.
- Assets & Property
- Optional, but can strengthen your case if you have home country ties.
- Income Proof
- Pay slips, tax returns, or business registration documents if self-funded.
Real-World Example
Consider two students applying for a Canadian study permit:
- Student A submitted a bank statement showing a single large deposit, claiming it covered tuition. The visa was denied due to inconsistent financial history.
- Student B submitted six months of steady bank balances, along with a sponsor letter and proof of tuition payment. Her visa was approved on the first attempt.
This illustrates that consistency and clarity outweigh sheer numbers.
Tips for Presenting Financial Proof
- Be Honest: Don’t overstate or fabricate balances. Verification is routine.
- Provide Context: Add brief notes if balances fluctuate seasonally (e.g., parents’ salary deposits).
- Organize Documents: Use a separate folder labeled “Financial Proof” with bank statements, sponsorship letters, and scholarship letters clearly arranged.
- Currency Conversion: Some consulates require proof in local currency or equivalent USD/EUR. Confirm requirements beforehand.
Takeaway
Demonstrating financial preparedness is about clarity, credibility, and consistency. Visa officers need confidence that you can manage your stay independently and responsibly. Proper documentation—bank statements, sponsorships, and scholarship letters—combined with careful organization, significantly boosts the likelihood of first-time visa approval.
Write a Strong Statement of Purpose (SOP)
The Statement of Purpose (SOP) is a critical component of your study-abroad visa application. Think of it as your personal narrative that explains your goals, intentions, and credibility to the visa officer. A strong SOP can differentiate your application from others, especially when first-time applicants are competing for approval.
Why the SOP Matters
Visa officers are trained to assess not only your documentation but also your intent and motivation. An SOP is your opportunity to:
- Demonstrate genuine purpose for studying abroad.
- Explain how your plans align with your academic or career goals.
- Prove intent to return to your home country after completing your program.
- Provide context for your financial, educational, or professional background.
Research shows that SOP quality significantly impacts approval rates. According to the Institute of International Education, students who submit clear, structured SOPs have a 30% higher first-time approval rate compared to those with generic or poorly articulated statements.
Key Components of an Effective SOP
- Introduction
- Begin with a clear statement of purpose: your intended program, university, and country.
- Use engaging but professional language to capture attention.
- Academic or Professional Background
- Highlight achievements relevant to your chosen field.
- Include projects, internships, or experiences demonstrating your preparedness.
- Reason for Choosing the Program/Country
- Explain why this country or institution is ideal for your studies or career.
- Mention faculty, curriculum, research opportunities, or specialization.
- Future Plans & Intent to Return
- Clearly state how the program contributes to your career goals at home.
- Highlight family, employment, or community ties to strengthen your credibility.
- Financial Planning
- Briefly explain how you will fund your studies.
- Refer to scholarships, personal savings, or sponsorship if applicable.
- Closing Statement
- Reinforce commitment to your goals and appreciation for the visa opportunity.
- Maintain a confident, professional tone without exaggeration.
Tips for Writing a Compelling SOP
- Be Concise & Clear: Avoid overly long paragraphs; stick to 800–1,200 words.
- Use a Logical Flow: Academic background → program choice → future plans → intent to return.
- Show Genuine Motivation: Avoid generic statements like “I want to experience a new culture.” Instead, link experiences to measurable outcomes.
- Proofread Carefully: Spelling or grammar errors can reduce credibility.
- Tailor SOP for Each Country/Program: Different visa officers may have varying expectations.
Real-World Example
A Nigerian student applying for a UK Tier 4 visa wrote a SOP highlighting:
- Her undergraduate achievements in computer science
- Why the UK university’s AI specialization was critical to her career
- Proof of strong ties to Nigeria through family business commitments
- Clear explanation of tuition funding via a scholarship
Her SOP was precise, structured, and credible. She received visa approval on her first attempt. In contrast, another student wrote a generic SOP without linking studies to future plans and was initially denied.
Takeaway
A strong SOP is more than a formality—it’s your voice to the visa officer. A well-crafted SOP demonstrates your purpose, credibility, and preparation, and significantly increases your chances of first-time visa approval. Always tailor it to your program, provide evidence of your background, and reinforce your intent to return home.
Ace the Visa Interview
The visa interview is often the final hurdle in the study-abroad process, and for many first-time applicants, it can feel intimidating. However, with preparation, clarity, and confidence, you can navigate the interview successfully and secure approval.
Why the Interview Matters
Visa officers are trained to assess credibility, intent, and preparedness in person. Even if your documentation is perfect, a poorly conducted interview can lead to denial. Officers typically evaluate:
- Consistency with submitted documents – discrepancies can trigger suspicion.
- Confidence and clarity – applicants who appear hesitant or evasive often face rejection.
- Intent to return – especially critical for student visas, to ensure you do not overstay.
Statistics from the U.S. Department of State indicate that interview performance can be a decisive factor in 20–25% of first-time visa denials, highlighting its importance.
Common Interview Questions
- “Why do you want to study in this country?”
- “What is your intended course of study?”
- “How will you fund your education?”
- “Do you plan to return home after graduation?”
- “What are your future career plans?”
- “Have you traveled abroad before?”
Preparation Strategies
- Practice Mock Interviews
- Conduct sessions with friends, mentors, or online coaching.
- Focus on clear, concise, and truthful answers.
- Know Your Documents Inside Out
- Be able to explain details in your bank statements, SOP, and admission letters without hesitation.
- Maintain Confidence and Professionalism
- Dress neatly in professional attire.
- Maintain good posture and steady eye contact.
- Avoid fidgeting or sounding unsure.
- Answer Honestly
- Never exaggerate financial capacity, academic achievements, or intentions.
- Inconsistencies with submitted documents are quickly detected and can lead to denial.
- Be Concise
- Provide clear answers without overexplaining.
- Avoid giving unnecessary personal details that could confuse the officer.
Real-World Example
A Nigerian student applying for a U.S. F-1 visa was well-prepared for her interview. She knew her SOP and financial documents inside out, confidently explained her study goals, and clearly demonstrated intent to return home after graduation. Approval came on the first day.
In contrast, another applicant was denied because he seemed unsure about his course choice and gave vague answers regarding his funding. His lack of preparation outweighed his otherwise strong documentation.
Tips to Stay Calm and Focused
- Practice deep breathing to reduce nerves.
- Visualize a successful interview scenario before attending.
- Remember that the officer is looking for credibility, not perfection.
Takeaway
A well-prepared interview is your chance to humanize your application and demonstrate seriousness, credibility, and intent. Confidence, clarity, and honesty combined with thorough knowledge of your documents significantly increase the likelihood of first-time visa approval.
Avoid Common Mistakes & Stay Compliant
Even with strong documents, a compelling SOP, and a confident interview, simple mistakes can derail a first-time visa application. Understanding common pitfalls and staying compliant with rules is essential for ensuring approval and avoiding unnecessary delays.
Top Mistakes to Avoid
- Incomplete or Incorrect Forms
- Leaving sections blank or providing inconsistent information is a leading cause of visa denials.
- Always double-check dates, spellings, and signatures.
- Providing False or Misleading Information
- Fabricating financial statements, academic records, or sponsorships is a serious violation.
- Verification processes are rigorous, and detected discrepancies often lead to automatic denial and future visa complications.
- Weak Proof of Ties to Home Country
- Visa officers want reassurance that you will return home after studies.
- Lack of evidence, such as property, employment, or family ties, can raise red flags.
- Poor Interview Preparation
- Hesitant, vague, or evasive answers during the interview reduce credibility.
- Practicing clear and confident responses is essential.
- Missing Deadlines
- Delayed submissions for applications, appointments, or document verification can push your visa processing back months.
Dos and Don’ts
Do Not:
- Submit incomplete documents.
- Exaggerate financial or academic information.
- Ignore interview preparation.
- Assume visa requirements are identical across countries.
- Forget to maintain copies of all submitted documents.
Do:
- Triple-check forms for accuracy and completeness.
- Be honest and transparent in all communications.
- Prepare thoroughly for the interview and practice responses.
- Follow official embassy or consulate guidelines strictly.
- Keep organized copies of all documents for reference.
Real-World Example
A student applying for a Schengen visa in Germany forgot to include proof of travel insurance. Even though all other documents were correct, the visa was denied due to this small oversight. Another applicant, who submitted a complete set of documents with attention to every detail—including travel insurance, accommodation proof, and bank statements—was approved within two weeks.
This illustrates how minor mistakes can lead to major setbacks. First-time applicants must treat every requirement as critical, regardless of how small it seems.
Takeaway
Staying vigilant and avoiding common mistakes is as important as preparing documents or acing the interview. A first-time visa approval depends on accuracy, honesty, and compliance with all requirements. Small oversights can result in delays or denials, but careful attention to detail positions you for smooth, successful visa processing.
Optional Bonus Section: Country-Specific Insights
While the previous steps provide a universal roadmap for first-time visa approval, each country has unique requirements and nuances. Understanding these can give you a strategic advantage and reduce the risk of delays or denials.
United States (F-1 & J-1 Visas)
- Interview Focus: Officers evaluate your intent to study and return home, financial stability, and ties to your home country.
- Key Tip: Prepare to discuss your course choice, career goals, and funding clearly.
- Processing Time: 2–8 weeks depending on consulate and season.
- Documents to Highlight: Form I-20, bank statements, academic transcripts, and SOP.
Example: A Nigerian student with strong family ties and scholarship proof received approval in two weeks, while another lacking clear intent had to reschedule the interview.
United Kingdom (Tier 4/Student Visa)
- Focus: Genuine Student Test (Genuine Student Intent), financial sufficiency, English proficiency.
- Key Tip: Include detailed evidence of tuition payment, accommodation, and sponsorship if applicable.
- Documents to Prepare: CAS letter from the university, bank statements covering living costs, passport, and SOP.
Example: One applicant demonstrated financial consistency with six months of bank statements and a scholarship letter, leading to first-time approval.
Canada (Study Permit)
- Focus: Acceptance by a recognized institution, proof of funds, ties to home country.
- Key Tip: Include property ownership, family connections, or future job plans in your home country to strengthen ties.
- Documents to Prepare: Letter of acceptance, proof of funds, SOP, passport, and biometrics if required.
Example: A student who included both a scholarship and family sponsorship documents was approved in two weeks, whereas a student submitting partial financial proof faced delays.
Schengen Countries (Short-term Study or Exchange)
- Focus: Travel insurance, accommodation, and clear study purpose.
- Key Tip: Ensure insurance covers the entire stay and all countries visited.
- Documents to Prepare: Visa application form, travel insurance, accommodation proof, financial proof, and SOP.
Example: Missing travel insurance caused one student’s application to be denied, whereas a fully prepared applicant received approval without delay.
Australia (Subclass 500 Student Visa)
- Focus: Enrollment in a recognized course, financial sufficiency, English proficiency, and compliance with visa conditions.
- Key Tip: Highlight prior academic achievements and clearly explain your study plans.
- Documents to Prepare: Confirmation of Enrollment (CoE), bank statements, English proficiency test results, SOP, and health clearance if required.
Example: A student with complete documentation, including English test scores and CoE, was granted a visa in under three weeks, demonstrating the importance of thorough preparation.
Takeaway on Getting Your Visa Approved the First Time
While the foundational steps—document organization, financial proof, SOP, interview preparation, and compliance—apply universally, country-specific nuances can make or break your first-time visa application. Researching and tailoring your approach to the destination country ensures smoother processing, faster approval, and fewer surprises.
Conclusion: Secure Your Study-Abroad Visa with Confidence
Securing your study-abroad visa the first time is not just about filling out forms—it’s about strategy, preparation, and attention to detail. From understanding your visa type and starting early, to organizing critical documents, demonstrating financial preparedness, writing a compelling SOP, acing the interview, and avoiding common mistakes, every step plays a crucial role in ensuring success.
The journey may seem overwhelming at first, but by approaching the process systematically, you position yourself ahead of thousands of other applicants who leave their applications to chance. Remember, visa officers are looking for credibility, consistency, and intent—qualities you can showcase with careful preparation and professionalism.
Country-specific nuances further highlight the importance of tailored preparation. Whether you’re applying for the U.S., UK, Canada, Schengen countries, or Australia, knowing what each consulate expects and aligning your application accordingly can make the difference between approval and delay.
The stakes are high, but the reward is transformative: the opportunity to study abroad, gain international exposure, and build a foundation for your future career. Start early, follow the steps, and approach each requirement with confidence and diligence.
Your dream of studying abroad doesn’t have to be delayed by preventable mistakes. By implementing these strategies, you can maximize your chances of first-time visa approval and step confidently into the next chapter of your academic journey.
Remember: Every day you delay preparation is a day lost in achieving your study-abroad goals. Start now, stay organized, and make your visa application process as smooth and successful as possible.